Get started with Destiny AI: Data Assistant
Ready to save time and simplify library and resource data management with Destiny? Here's how to get started with your new data assistant.
|
Notes about Destiny AI: Data Assistant:
|
Once you have Destiny AI: Data Assistant enabled, you can get started.
|
|
Access Destiny.From your Site Dashboard ( |
|
|
|
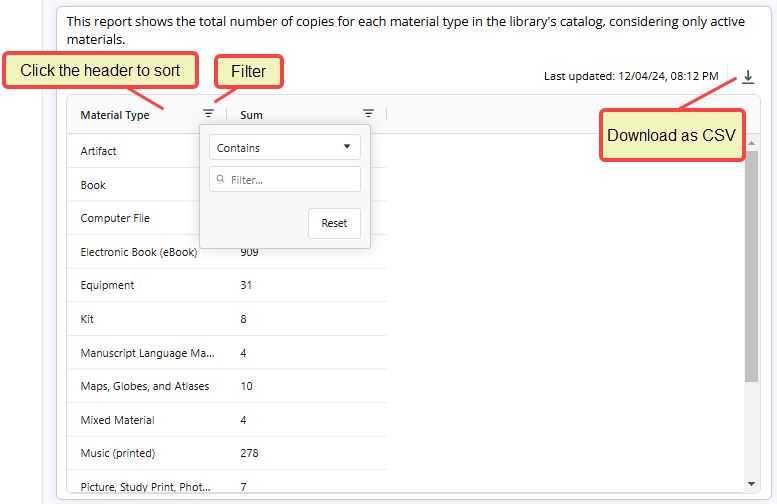
Enter a prompt.Destiny AI: Data Assistant can answer questions about your library catalog and circulation data, as well as resource catalog, circulation, and inventory data. It responds to questions asked in everyday language, and even asks follow-up questions if it's not sure what you mean. You can also ask for best practice recommendations, such as how to weed your collection. For the best results, use clear and specific queries. There is a question bank you can use as a starting point and then customize to meet your needs. Learn more about writing good prompts, and see examples.
|
|
|
|
View the response.Responses can include quick insights for basic data inquiries, as well as detailed, easy-to-read reports. With reports, you can download your results as a CSV file to sort and filter the data.
If you need more specific data or have follow-up questions, keep the conversation going.
|
|
|
|
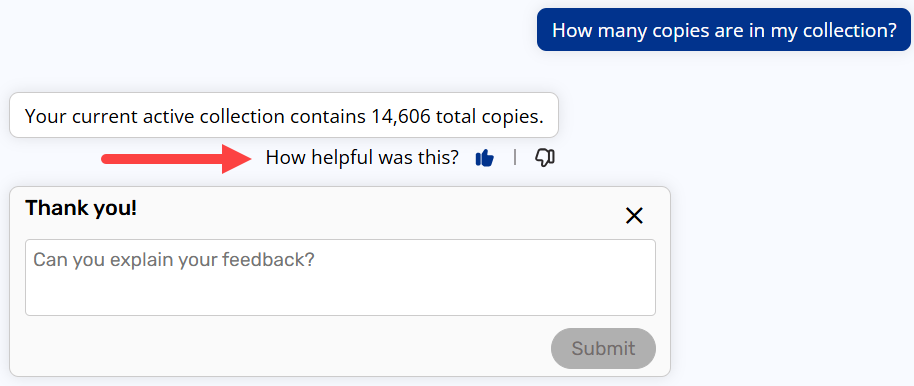
Provide feedback.Use the thumbs up or thumbs down voting feature to provide feedback on the quality of the response. This helps to train and refine Destiny AI: Data Assistant. Once you rate the response, you can also type an explanation.
|


Manage conversations
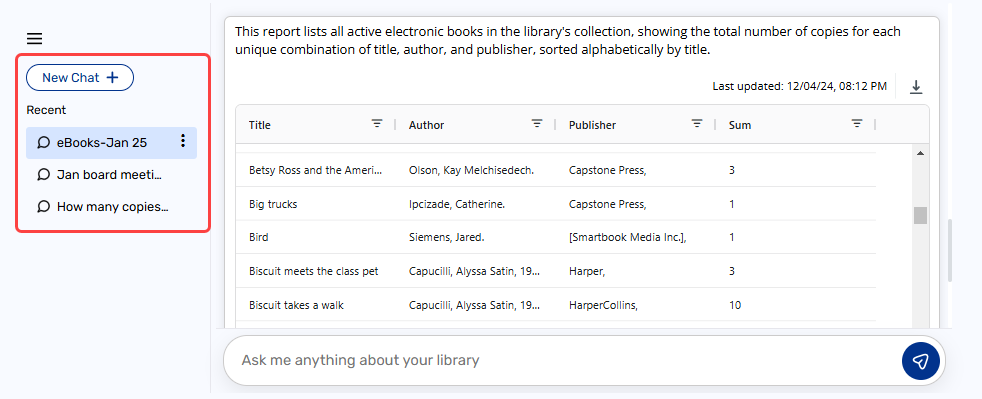
When you access the Data Assistant tab, your last chat appears. You can continue the chat, access a previously saved one, or start a new one. Chats can be renamed for easy reference and deleted when no longer needed. To access these options, next to a chat, click ![]() .
.
|
Note: Each user can save up to 100 conversations. If you reach the maximum, you will be prompted to delete the oldest conversation to start a new chat. |